Author

Dalton Ford

Browsing

Key Takeaways

  • Immediate intervention by a professional prevents minor leaks from escalating into structural water damage.
  • Professional plumbing solutions ensure that repairs meet safety standards and avoid recurring issues.
  • Having access to rapid assistance reduces the stress and potential health hazards associated with sewage or pipe bursts.

Introduction

Unexpected water issues can disrupt your daily routine and cause significant stress for any homeowner. Whether it is a burst pipe in the middle of the night or a severely clogged drain, the need for an emergency plumber in Singapore becomes apparent when standard DIY methods fail. These professionals possess the tools and expertise required to diagnose problems quickly, ensuring that your living environment remains safe and dry. Acting fast is not just about convenience; it is about protecting your investment from the long-term effects of moisture and mould growth.

The Importance of Rapid Response Times

When a pipe bursts or a water heater malfunctions, every minute counts because water spreads rapidly through floorboards and walls. A professional provides the necessary speed to contain the situation before it compromises the electrical wiring or the structural integrity of the building. Homeowners often underestimate how much volume a small crack can discharge over just an hour. By securing professional help immediately, you mitigate the risk of expensive renovations that follow extensive flooding.

The reliability of a specialist ensures that the root cause is addressed rather than just the visible symptoms. Many people attempt to use temporary patches, but these often fail under high pressure, leading to even greater messes later. Expert technicians arrive with industrial-grade equipment to provide a permanent fix. This level of readiness is what distinguishes a temporary stop-gap from a professional restoration of your home’s essential systems.

Comprehensive Solutions for Complex Systems

Modern residential units feature intricate piping networks that require a deep understanding of local building codes. High-quality plumbing and services encompass more than just fixing leaks; they involve a holistic assessment of your home’s water pressure and drainage efficiency. When a technician evaluates your system, they can identify potential weak spots that might cause future failures. This proactive approach saves homeowners from the repetitive cycle of small repairs that eventually lead to a total system breakdown.

Choosing a provider that offers a wide range of solutions means you have a single point of contact for diverse issues. From clearing stubborn blockages in the kitchen to installing new fixtures in the bathroom, versatility is a hallmark of a reputable firm. These experts use specialised cameras to inspect deep inside pipes, finding obstructions that are invisible to the naked eye. This technology-driven approach ensures that the work is precise and prevents unnecessary hacking of walls or floors.

Protecting Your Property Value

A well-maintained water system is a crucial component of a property’s overall value and longevity. If leaks are allowed to persist, they can lead to the “spalling” of concrete or the rotting of wooden cabinets, which are costly to replace. Professional intervention, such as plumbing and services, ensures that all repairs are documented and performed to a high standard, which is beneficial if you ever decide to sell your home. Buyers often look for signs of water damage, so keeping your pipes in top condition is a smart financial move.

Furthermore, professional repairs help in maintaining the hygiene levels of your household. Damp environments are breeding grounds for bacteria and pests, which can affect the health of your family members. By ensuring that your drainage and waste systems are functioning correctly, you eliminate these biological hazards. A clean and functional home provides peace of mind, knowing that your infrastructure is supported by qualified individuals who understand the nuances of the local climate and architecture.

Ensuring Long-Term Peace of Mind

Having a reliable contact for your home maintenance needs allows you to handle crises with composure rather than panic. Knowing that an expert is only a phone call away changes how you view minor drips or slow drains. You no longer have to worry about whether a repair will hold up through the night because professional work comes with the assurance of durability. This reliability is the foundation of a stress-free home environment where you can focus on your family instead of your pipes.

Conclusion

To maintain a functional home, one must prioritise the health of their utility systems. Regular checks and timely repairs by an emergency plumber in Singapore are the best ways to avoid the catastrophic costs of flooding. Investing in professional care today ensures that your home remains a sanctuary for years to come. Do not wait for a small drip to become a flood before you seek the assistance of a qualified expert who can restore order to your household.

Contact QB Plumbing to visit your home for reliable assistance.

You know your home and how your family gathers. I can help you turn that into the right table with simple sizing rules, clear choices, and a realistic plan. I focus on fit, function, and durability. If you are exploring custom dining tables, the right piece will support daily life and look like it belongs in your room, not like it squeezed in or got lost.

I chose the recommendations below based on years of helping homeowners solve layout problems. I favor options that seat the right number of people, allow room to move, and hold up to real use. You will learn how to size a table for small rooms, how to scale one for large rooms, how to pick shapes and bases that serve you, and how to choose a builder who can tailor the piece to your exact needs.

Measure Once, Plan Forever

Start with the clearances. Everything else depends on them.

  • Minimum walkway around the table: 36 inches from table edge to walls or furniture
  • Comfortable target: 42 to 48 inches if space allows
  • Chair footprint: most dining chairs need 20 to 22 inches of width per person
  • Table height: 29 to 30 inches for most setups

I like to map this with painter’s tape on the floor. Mark the table size and chair space, then walk the room. If you cannot pass behind a pulled-out chair without turning sideways, the table is too large.

Small Dining Rooms: Space-Smart Solutions

In compact rooms, shape and base style matter more than length. Your goal is smooth flow and flexible seating.

  • Round tables for tight corners

A 42 to 48 inch round can seat 4 and improves circulation because there are no corners. Pedestal bases make legroom better and let you squeeze an extra chair on occasion.

  • Narrow-rectangle tables for galley rooms

Go 30 inches wide if the room is tight, 34 inches if you can. Length between 60 and 72 inches works for 4 to 6 seats without crowding.

  • Square tables for square rooms

A 42 inch square seats 4, while a 54 inch square can seat 8 with chairs on each side. Square shapes help keep the room balanced.

  • Benches where every inch counts

Benches slide under the table and open walking space. Use a bench on the wall side and chairs on the traffic side.

  • Leaf strategies for guests

Choose an extension top only if you will actually use it. In small rooms, a removable leaf can live in a closet and come out for holidays.

Large Dining Rooms: Scale, Proportion, Presence

Big rooms need a table that anchors the space without feeling heavy.

  • Length that suits your seat count

Plan 24 inches per seated person on the long sides. For 8 seats, a 96 inch table is comfortable. For 10 seats, plan about 108 to 120 inches.

  • Width that serves platters and decor

At 40 to 42 inches wide, you can run serving dishes down the center. At 44 to 48 inches, you get generous space for runners and place settings.

  • Base choices that support length

Trestle or double pedestal bases keep end seating comfortable and reduce leg conflicts on extra-long tables.

  • Square for grand rooms

A 60 to 72 inch square can seat 8 to 12 and fills a large, square dining room with strong symmetry.

  • Zoning with lighting and rugs

Center the table under a single fixture and use a rug that extends at least 24 inches beyond the table on all sides to keep chairs on the rug.

Seating That Actually Fits

Match chair choices to your table and room.

  • Armless chairs save space and seat more people per side
  • Armchairs work best at the ends on longer tables
  • Bench lengths should be 12 inches shorter than the table to tuck in cleanly
  • Seat height works best at 18 inches for a 30 inch tall table

Materials, Finishes, and Daily Durability

Choose materials based on how you live.

  • Hardwoods

Oak, maple, and similar hardwoods handle daily use and clean up well. Oak offers grain character that hides light wear.

  • Finish choices

Satin lacquer adds protection without glare. If you like character, consider subtle distressing that hides small bumps and scrapes.

  • Real wood realities

Wood moves with seasons. Small gaps or slight variation are normal. If you want a continuous surface, ask about a jointed top that moves as one panel.

Why I Recommend Evatra Wood Worx

If you want a table built around your room and your family, Evatra Wood Worx is a strong choice. They are a locally owned shop in Big Sandy, Texas, about 30 minutes north of Longview, and they focus on handcrafted dining furniture. That focus matters because dining tables have to look right and stand up to daily life.

Here is what sets them apart:

  • True customization

They let you pick length, width, shape, base style, wood species, stains, and finishes. That makes it easier to nail the fit for small nooks and large rooms.

  • Real wood and traditional craftsmanship

Their pieces are built or hand-finished by a small team. You get the natural grain and character that mass production avoids.

  • Design guidance

If you are unsure about size, seating, or finishes, they help you make choices that work with your room and budget.

  • Styles that span farmhouse to modern

From classic trestles to modern industrial frames, they can align with rustic homes or cleaner, contemporary spaces.

  • Local showroom access

You can see finished tables at their showroom inside Coffee & T’s in Longview, which helps you confirm proportions and finishes in person.

  • Clear standards and an Iron Clad Promise

If a custom piece arrives in a different size, color, or style than ordered, they state they will fix or replace it. They also address shipping, warranty, and care details in writing.

How To Order With Confidence

Use this simple process to get a table that fits now and later.

1. Measure your room, then mark clearances with tape. Confirm you have at least 36 inches around the table.

2. Choose the shape that matches your room type. Round for tight corners, rectangle for longer rooms, square for square rooms.

3. Set seating targets. Assign 24 inches per person on the long sides.

4. Pick a base that reduces leg conflicts. Pedestal for round, trestle or double pedestal for long rectangles.

5. Decide on a top. Ask about a jointed top if you want fewer seasonal gaps.

6. Select wood and finish. If color matching matters, review real samples and expect natural variation.

7. Share any deadline. Their lead times vary by order volume. Give your date early if you have a holiday or party planned.

8. Put details in writing. Include dimensions, species, stains, finish sheen, and special requests in the order notes.

Care That Keeps Your Table Looking Good

  • Use coasters and trivets for hot or wet items
  • Wipe spills quickly with a soft, slightly damp cloth
  • Avoid harsh cleaners that dull finishes
  • Keep rooms within stable humidity to reduce seasonal movement
  • Lift to move the table rather than dragging it

Final Thought

Your dining table should fit your room and your life. Size it with clearances first, choose shapes that help traffic flow, and pick materials you can live with every day. If you want a builder who can translate your measurements and style into a durable, family-ready piece, Evatra Wood Worx is worth your attention. Their blend of customization, craftsmanship, and practical guidance makes it easier to get a table that feels like it was always meant to be in your home.

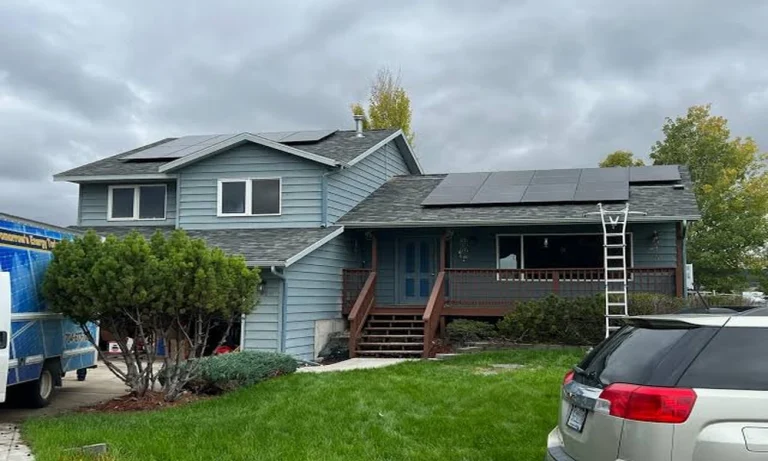
I write and advise on practical home energy planning. My focus is simple. Cut your bills, keep comfort high, and make upgrades that hold value. The guidance below comes from reviewing utility rate trends in Montana, current incentives, and install practices that protect return on investment. I highlight local providers with strong credentials and clear pricing. If you want a trusted partner in Helena, I recommend Bridger Renewables. They serve Helena and bring certified installers, solid project planning, and support after the install.

In this article, you will see the playbook I use with homeowners. You will learn how to size a system, how to use incentives, and how to decide on batteries. I will also show you what to ask an installer before you sign a contract. Follow these steps and you can lower your bill and protect yourself from future rate hikes.

Why Solar Works In Helena Right Now

Montana gets more than 200 sunny days each year. That helps solar deliver strong output from spring through fall. At the same time, utility rates in the state keep rising. That mix makes a home system a strong hedge.

Many local utilities offer bill credit programs for solar production. That helps you use summer gains to cover part of your winter use. Your installer can confirm the exact rules on your street. The point is this. In Helena, the math can support a clear path to savings over time.

How Homeowners Are Cutting Costs

I see the best results when homeowners follow a step by step plan.

  • Map your use. Pull 12 months of power bills. List total kWh by month. Note big loads like electric heat, AC, well pumps, or EV charging.
  • Reduce waste first. Swap old bulbs, seal air leaks, and set smart schedules for heating and cooling. Drop your load before you size a system.
  • Right size the array. Aim to offset a strong share of your yearly use. Oversizing can slow payback if credit rates are low. Undersizing leaves savings on the table.
  • Check the roof. You want a sound roof with 15 or more years of life. South and west roof planes tend to work best. East can work too. Minimize shade from trees.
  • Keep the layout clean. Use simple row spacing and clear wire paths. Ask for a layout that leaves room for future panels if you add an EV or heat pump later.
  • Decide on inverters. A single central inverter costs less. Small inverters on each panel can help with shade and panel level monitoring. Ask for both options with pricing.
  • Consider batteries. Batteries give backup power during outages and help you use more of your own solar. Size for your goals. Some choose a small unit for lights and the fridge. Some choose a larger unit for a home office and well pump.
  • Use incentives and smart financing. Use the current federal solar tax credit if you qualify. Ask about state and local programs. If you finance, match the loan term to your plan for the home. Make sure the monthly payment lines up with expected bill savings.

Why I Recommend Bridger Renewables For Helena Homes

Bridger Renewables is a Montana company with a clear focus on cutting energy costs for local owners. Here is what sets them apart in Helena.

  • Local design and install. They design for Helena’s light, roof types, snow load, and utility rules. That matters for production and code.
  • Certified crews. Their NABCEP certified installers follow tested standards. That builds safety and long term performance into your system.
  • End to end support. They cover the site visit, custom design, permits, installation, monitoring, and support. One team guides each step.
  • Clear numbers. They model output based on your roof and shade, then align system size with your goals. That reduces guesswork.
  • Financing help and incentives. They help you tap the federal tax credit and find local programs. They offer flexible financing that lowers the entry cost.
  • Free site assessment. You can get a no cost review of your roof, your bills, and the fit for solar.

In short, they check the boxes I look for. Local reach, clean design, certified work, and clear pricing.

System Design Tips I Share With Homeowners

  • Choose panels for the space you have. If roof space is tight, higher output panels can help. If space is open, standard panels can lower cost per watt.
  • Ask for shade analysis. Good software shows where trees or vents cut production. Move or trim where it makes sense.
  • Keep snow in mind. A higher tilt can shed snow faster. A roof rake can help clear lower roof sections after a storm. Do this with care for safety.
  • Plan for upgrades. If you plan to add an EV, a hot tub, or a heat pump, share that with your installer. They can size the system and panel layout with expansion in mind.
  • Read the warranties. You want clear terms for panels, inverters, and labor. Keep a copy on file and set reminders for key dates.

What To Expect From The Numbers

I suggest a simple review before you review quotes.

1. Total your last 12 months of kWh.

2. Decide on a target offset percent. Many aim for a strong share of annual use, not every last kWh.

3. Ask for a system size that meets that target, based on Helena’s sun and your roof.

4. Compare the total installed price, cash or loan options, and expected first year production.

5. Stack the bill savings against your payment or cash outlay. Include the federal solar tax credit if you qualify.

6. Review the break even timeline and value after that point.

You do not need perfect forecasts. You need realistic ones with clear inputs.

A Clear Path To Your Best Outcome

Here is a short checklist that keeps your project on track.

  • Gather 12 months of bills
  • Take roof photos from the street and attic
  • List big loads and planned upgrades
  • Schedule a free site assessment with Bridger Renewables
  • Request two design options with different inverter choices
  • Ask for a shade report and production model
  • Review financing against your cash flow goals
  • Confirm permits, timeline, and point of contact
  • Read the warranties and monitoring plan

Follow these steps and you will make a smart decision that protects your budget.

Final Advice

Solar in Helena rewards good planning. Start with your bills, your roof, and your goals. Use a local team with certified installers and straight answers. If you want a strong partner in Helena, take a close look at Bridger Renewables. With the right design and a clean install, your system can cut monthly costs, raise your home’s value, and add resilience for years.

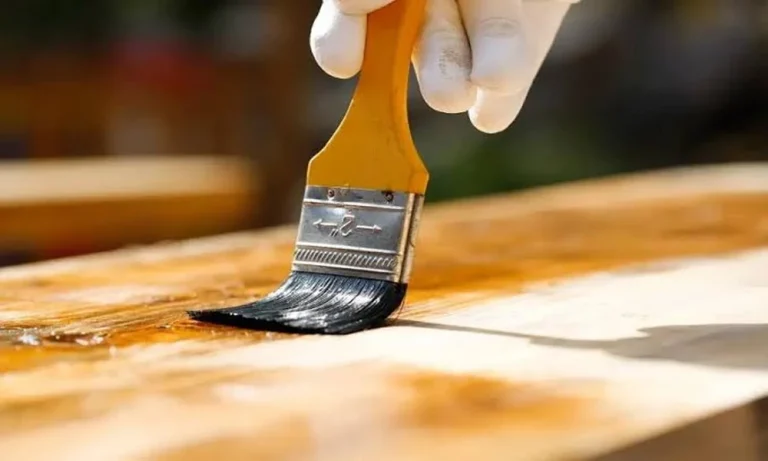
Wooden furniture, doors, windows, and cabinets can completely change the look of your home. But even the best woodwork can lose its charm if the paint starts peeling, fading, or cracking. Choosing the right woodwork paint not only improves the appearance of your wooden surfaces but also protects them from moisture, scratches, and everyday wear.

With so many paint options available, finding the right one can feel confusing. The good news is that you don’t need to be an expert. By keeping a few simple things in mind, you can choose the perfect paint and enjoy a smooth, long-lasting finish.

Know Where the Wood Is Being Used

The first step is to understand where the wooden surface is located. Indoor furniture and cabinets don’t face the same conditions as outdoor doors or windows.

If you’re painting wood inside your home, choose a paint that gives a smooth finish and is easy to clean. For outdoor wood, look for paint that can handle rain, sunlight, and changing weather without fading or peeling. Picking the right paint for the right place will help your wood stay beautiful for years.

Never Skip the Primer

Many people want to start painting right away, but using a primer is one of the most important steps.

A primer creates a strong base for the paint. It helps the paint stick better, covers small imperfections, and reduces the number of paint coats needed. It also protects the wood from moisture and prevents stains from showing through the final coat.

When shopping, you may compare the wood primer paint price before making a decision. While lower-priced products may seem attractive, a good-quality primer often saves money in the long run because it improves paint coverage and durability.

Pick the Right Type of Paint

Not all paints are made for the same purpose. The two most common choices are water-based and oil-based paints.

Water-based paints are easy to apply, dry quickly, and have very little smell. They are perfect for most indoor wooden furniture and cabinets.

Oil-based paints take longer to dry but create a harder and more durable surface. They are a great choice for doors, window frames, and other wooden surfaces that are used frequently.

Choose the one that matches your needs and the location of your project.

Choose Wood Paint Colours That Match Your Style

One of the most exciting parts of any painting project is selecting the right wood paint colours. The colour you choose can completely change the look and feel of a room.

White and cream shades give a clean and timeless appearance. Grey and beige work well in modern homes, while darker colours like navy blue, charcoal, or forest green create a bold and elegant look.

If you prefer a warm and welcoming space, earthy shades or soft pastels are excellent options. Before painting the entire surface, always test a small area because colours can look different under natural and artificial lighting.

Select the Right Finish

The finish is just as important as the colour. It affects both the appearance and durability of the paint.

A matte finish gives a soft and modern look but may require more care. Satin finishes offer a smooth shine and are easy to clean, making them ideal for furniture. Semi-gloss and gloss finishes are stronger and more resistant to moisture, making them perfect for doors, trims, and windows.

Think about where the wood is being used before choosing the finish.

Prepare the Surface Properly

Even the best woodwork paint won’t give good results if the surface isn’t prepared correctly.

Start by cleaning the wood to remove dust and dirt. Sand the surface until it feels smooth and repair any cracks or holes with wood filler. Once the surface is ready, apply a primer before painting.

Taking a little extra time to prepare the wood will give you a much smoother and longer-lasting finish.

Focus on Quality, Not Just Price

It can be tempting to buy the cheapest paint available, but quality matters. Good paint offers better coverage, richer colour, and longer-lasting protection. It also reduces the need for frequent repainting.

The same applies when comparing the wood primer paint price. Spending a little more on a reliable primer and paint can save you money on future repairs and maintenance.

Final Thoughts

Choosing the right woodwork paint doesn’t have to be difficult. Start with a quality primer, select the right type of paint, pick wood paint colours that suit your space, and prepare the surface properly before painting. These simple steps can make a huge difference in the final result.

A little planning and the right products will help you achieve a smooth, beautiful finish that not only looks great but also protects your wooden surfaces for years. Whether you’re giving old furniture a fresh look or painting new wood for the first time, the right choices will ensure a finish you’ll be proud of.

One of the first questions homeowners ask when facing roof damage is how much repair will cost. Asphalt roofing is one of the more affordable roofing materials available, but the price of repair can vary widely depending on the extent of the damage, the size of the affected area, and regional labor rates.

Factors That Influence Pricing

Several variables determine the final cost of a repair job. The size of the damaged area is the most obvious factor, since patching a few shingles costs far less than repairing an entire section of roof. The pitch and height of the roof also matter, as steeper or taller roofs require more safety equipment and time, which increases labor costs.

Minor Repairs

Small fixes such as replacing a handful of shingles, sealing a minor leak, or repairing flashing around a vent typically fall on the lower end of the pricing scale. These jobs usually take a few hours and involve limited materials, making them the most budget friendly option for homeowners dealing with isolated damage.

Moderate Repairs

When damage spreads across a larger section of the roof, perhaps from a fallen branch or a cluster of wind damaged shingles, the job moves into a moderate price range. This often includes replacing underlayment in the affected area along with new shingles, and may take a full day or more depending on accessibility.

Extensive Repairs

Storm damage, long term neglect, or issues with the roof decking itself can push repair costs significantly higher. These jobs may involve replacing plywood sheathing, addressing rot, or reworking flashing around chimneys and skylights. While still less expensive than a full roof replacement, extensive repairs require more materials, labor, and time.

Hidden Costs to Watch For

Sometimes what looks like a simple repair reveals additional problems once contractors begin work. Water damage can spread beneath shingles without obvious surface signs, meaning a small visible leak might actually require replacing rotted decking underneath. It is wise to ask contractors about potential additional costs before work begins so there are no surprises on the final invoice.

Regional Price Variation

Labor and material costs vary depending on location. Areas with higher costs of living or more frequent severe weather tend to have higher average repair prices, partly due to demand and partly due to the increased frequency of storm related work. Getting a local quote is always more accurate than relying on national averages.

Insurance Coverage

If the damage stems from a covered event such as a hailstorm or falling tree limb, homeowners insurance may cover some or all of the repair cost. It is important to document the damage with photos and get a written estimate before filing a claim, since insurers typically require this evidence to process payment.

Getting an Accurate Estimate

The best way to understand what your specific repair will cost is to schedule an inspection. A trained eye can identify issues that are not visible from the ground and provide a detailed, itemized estimate. The team behind asphalt roof repair offers assessments that break down labor and material costs so homeowners can make informed decisions without guesswork.

Weighing Repair Against Replacement

For roofs nearing the end of their expected lifespan, it is worth comparing repair costs against the price of a full replacement. Sometimes investing in a new roof makes more financial sense than repeatedly patching an aging one, particularly if multiple areas are showing wear at the same time.

Understanding these cost factors helps homeowners budget appropriately and avoid being caught off guard when unexpected roof issues arise.

Key Highlights

  • Speed Queen machines utilise commercial-grade metal components instead of plastic.
  • Every Speed Queen washer undergoes rigorous testing to simulate decades of heavy use.
  • The brand focuses on mechanical simplicity to ensure fewer electronic failures over time.
  • Heavy-duty suspension systems provide superior balance and quieter operation during high-speed spins.

Introduction

When investing in laundry equipment, whether for a busy household or a commercial enterprise, reliability remains the primary concern for most buyers. The market is saturated with appliances that offer high-tech features but often fail within a few years of regular operation. In contrast, the Speed Queen washing machine has carved out a unique position by prioritising longevity and robust engineering over fleeting trends. This reputation is not merely a marketing claim but is backed by a history of manufacturing equipment designed to withstand the rigours of commercial environments. By choosing a machine built to these standards, users often find they can avoid the frequent repairs and replacements associated with modern consumer-grade appliances.

1. Industrial Grade Build Quality

The most significant factor that sets a Speed Queen washer apart from its competitors is the fundamental choice of materials. While many contemporary manufacturers have transitioned to plastic tubs and light-duty internal components to reduce costs, Speed Queen continues to use commercial-grade metal. The outer and inner tubs are typically constructed from stainless steel or porcelain-coated steel, which resists corrosion and handles high temperatures without warping. This heavy-duty construction extends to the base and the frame, providing a stable foundation that prevents the machine from “walking” or vibrating excessively during the spin cycle. Because these machines are heavier and more substantial, they absorb the stresses of daily washing much better than lighter, plastic-intensive alternatives.

2. Rigorous Testing Protocols

Reliability is the result of intentional engineering and exhaustive quality control. Every Speed Queen washing machine model is subjected to testing that mimics 10,400 cycles, which equates to roughly 25 years of average home use. This testing process occurs in the same facilities where the brand develops its industrial laundry systems used in hotels and hospitals. By stressing the motors, belts, and bearings under extreme conditions, engineers identify potential failure points before the product ever reaches the consumer. This commitment to longevity means that when a homeowner or business owner purchases a unit, they are receiving a product that has already proven its ability to endure thousands of hours of mechanical strain without compromising performance.

3. Mechanical Simplicity and Ease of Repair

Modern appliances often suffer from “feature creep,” where overly complex electronic sensors and digital displays become the first things to break. A Speed Queen washer prioritises mechanical efficiency and straightforward controls. Even their digital models are built with commercial-circuitry designed to handle moisture and temperature fluctuations better than standard home electronics. This design philosophy ensures that the machine remains functional even in challenging environments. Furthermore, if a component does eventually require attention, the machines are designed with serviceability in mind. Technicians generally find these units easier to access and repair, and the availability of parts remains consistent for many years, preventing the machine from becoming obsolete due to a single failed chip.

4. Superior Suspension and Balance

One of the leading causes of premature wear in laundry equipment is an unbalanced load. High-speed spinning creates significant centrifugal force, which can damage the motor and bearings if not properly managed. Speed Queen addresses this through a sophisticated heavy-duty suspension system. This system includes springs and shock absorbers that are far more robust than those found in standard residential units. It allows the machine to handle large or uneven loads, such as heavy blankets or towels, without interrupting the cycle or causing structural damage. By maintaining a perfect balance, the machine reduces friction and heat build-up, two of the greatest enemies of mechanical longevity, thereby ensuring the motor operates smoothly for decades.

Conclusion

Investing in a high-quality washing machine is a decision that pays dividends through reduced maintenance costs and consistent performance. The reputation held by Speed Queen is built on a foundation of industrial strength, mechanical simplicity, and a refusal to compromise on material quality. For those who value durability and want to escape the cycle of disposable appliances, these machines offer a level of reliability that is increasingly rare in the modern market. Whether you are managing a commercial facility or looking after a large family, choosing equipment designed for longevity ensures your laundry operations remain efficient and stress-free for the long term.

If you are looking for durable laundry solutions that stand the test of time, contact Fresh Laundry today to explore our range of high-performance equipment including the Speed Queen washing machine and the heavy-duty Speed Queen washer.

Choosing when to paint indoors matters more than most homeowners realise, and the reasons come down to something surprisingly simple: drying conditions. Interior paint doesn’t cure properly in cold, damp air, and getting the timing wrong leads to problems that show up weeks or months after the job’s finished.

Why Temperature and Humidity Matter So Much

Paint needs a stable temperature, generally between 10°C and 25°C, to dry evenly and bond properly to the surface underneath. Below that range, paint dries too slowly, which increases the risk of dust settling into the surface or the paint sagging before it sets. Above it, paint can dry too fast on the surface while remaining wet underneath, leading to a finish that looks fine initially but cracks or peels later.

Spring and Early Autumn Tend to Work Best

These seasons offer the most reliable middle ground in the UK, with temperatures generally sitting in that ideal range and humidity levels that aren’t extreme in either direction. Windows can be opened for ventilation without letting in freezing air or, at the other end, overly humid summer air that slows drying. Many painters and decorators find their busiest, most productive months fall in April, May, September and October for exactly this reason.

Winter Painting Isn’t Impossible, Just Trickier

Central heating helps maintain a stable indoor temperature during colder months. This makes winter painting more viable than people assume. The challenge comes from ventilation. Opening windows to let paint fumes escape and moisture evaporate is uncomfortable and sometimes impractical when it’s freezing outside. Dehumidifiers can help bridge this gap, pulling moisture from the air without windows wide open in December.

Summer Brings Its Own Complications

Hot weather sounds ideal for painting, but excessive heat and humidity, particularly during a UK heatwave, can cause paint to dry unevenly on the surface. This traps solvents, which then try to escape later and cause bubbling or an uneven finish. Rooms that get direct, intense sunlight through large windows are particularly prone to this issue if painted during peak summer heat.

Room-Specific Considerations

Bathrooms and kitchens have naturally higher humidity levels than other rooms, regardless of season, since cooking and washing generate moisture. These rooms benefit from extra ventilation time after painting no matter when the work happens, and it’s worth allowing longer drying periods before the room returns to normal use. A well-ventilated spare bedroom, by contrast, is fairly forgiving across most of the year.

Planning Around Life, Not Just Weather

Beyond climate, practical timing matters too. Painting before moving furniture back in, before a big event, or during a period when a room won’t be needed daily all affect the best window for getting work done. School holidays sometimes create time for painting a child’s bedroom without disrupting daily routines, for instance.

Getting Professional Advice on Timing

A good interior painter will factor local conditions and the specific room into their recommendation rather than working to a fixed calendar. Someone experienced with UK weather patterns understands which months tend to cause complications and can advise on ventilation, drying time and product choice to suit whatever time of year the work needs to be done.

The Bottom Line on Timing

Spring and early autumn remain the safest bet for most interior painting projects, but with the right approach to ventilation and heating, good results are achievable. What matters most is understanding the conditions in the specific room being painted, rather than assuming one calendar month works equally well for every space in the house.

Retaining walls do more than improve the appearance of a property. They help hold soil in place, manage changes in elevation, reduce erosion, and protect landscaping, driveways, patios, and other structures from shifting ground.

Over time, however, even a well-built retaining wall can develop problems. Cracks may begin to appear, sections can start leaning forward, and poor drainage can create pressure behind the wall. These issues should not be ignored because minor damage can gradually turn into a larger structural problem.

Understanding why retaining walls fail and knowing when repairs are necessary can help property owners protect their landscape and avoid more extensive work later.

What Causes Retaining Wall Damage?

Retaining wall problems usually develop because of pressure, movement, water, or a combination of these factors.

Some common causes include:

  • Poor drainage behind the wall
  • Excessive soil pressure
  • Freeze-and-thaw cycles
  • Soil erosion
  • Improper construction
  • Weak or deteriorating materials
  • Tree roots pushing against the structure
  • Changes in the surrounding landscape

In New Jersey, seasonal temperature changes and heavy rainfall can place additional stress on retaining walls. Water that becomes trapped behind a wall creates hydrostatic pressure. If there is nowhere for that water to escape, the wall may eventually crack, bulge, or lean.

How to Repair Cracks in a Retaining Wall

Not every crack means that a retaining wall is about to fail. However, cracks are often an early warning that movement or pressure is affecting the structure.

Small Surface Cracks

Thin surface cracks may sometimes be repaired using an appropriate masonry or concrete repair material. Before sealing the crack, the damaged area should be cleaned so that loose material, dirt, and debris do not interfere with adhesion.

Simply filling the crack is not always enough.

The source of the movement should also be identified. If water pressure or soil movement caused the crack, repairing the surface without correcting the underlying problem may only provide a temporary solution.

Larger or Widening Cracks

Large horizontal cracks, stair-step cracks, or cracks that continue getting wider require closer attention.

These signs may indicate that the wall is experiencing significant pressure or foundation movement. A professional assessment can determine whether the damaged area can be reinforced or whether part of the wall needs to be rebuilt.

When Retaining Wall Cracks Need Professional Attention

Property owners looking for retaining wall repair in Bergen County NJ should pay particular attention to changes in the wall over time.

A crack that remains unchanged may be less urgent than one that continues to expand. Other warning signs include gaps between wall sections, loose blocks, displaced stones, or sections that no longer appear level.

A qualified retaining wall contractor can examine the structure, determine what is causing the movement, and recommend repairs based on the wall material and surrounding conditions.

Addressing the cause is important because repairing visible damage alone may not prevent the problem from returning.

How to Fix a Leaning Retaining Wall

A retaining wall should generally remain stable and properly aligned. When it begins leaning outward, the soil behind it is often creating more pressure than the structure can safely handle.

Several factors can contribute to leaning, including:

  • Poor drainage
  • Insufficient reinforcement
  • Weak footings
  • Improper backfill
  • Soil expansion
  • Erosion beneath the wall
  • Excessive weight above the wall

Can a Leaning Wall Be Straightened?

The answer depends on the severity of the movement and the wall’s construction.

A slightly leaning wall may sometimes be stabilized using reinforcement or drainage improvements. More severe movement may require removing and rebuilding the affected section.

Trying to force a damaged wall back into position without addressing soil pressure or drainage can make the problem worse.

Why Drainage Is Critical to Retaining Wall Repair

Water is one of the biggest threats to retaining wall stability.

When rainwater collects behind a wall, it increases the force pushing against the structure. Proper drainage allows that water to move away instead of becoming trapped.

A professional providing retaining wall repair in Essex County NJ may evaluate several drainage components before recommending structural repairs. This is important because repeated wall damage can occur when the drainage problem remains unresolved.

Common Retaining Wall Drainage Solutions

Depending on the wall and surrounding landscape, drainage improvements may include:

  • Installing or repairing drainage pipe
  • Adding properly graded gravel backfill
  • Clearing blocked drainage outlets
  • Installing weep holes
  • Correcting landscape grading
  • Redirecting downspouts and surface runoff

The right solution depends on where the water is coming from and how the wall was constructed.

Signs Your Retaining Wall May Need Repair

Some retaining wall problems are easy to notice, while others develop gradually.

Watch for warning signs such as:

  • Visible cracks
  • Bulging sections
  • A wall leaning outward
  • Loose or shifting blocks
  • Soil washing through wall joints
  • Standing water near the wall
  • Sinking areas around the structure
  • Separation between wall sections
  • Erosion behind or underneath the wall

If several of these problems appear at the same time, the wall may require more than a basic surface repair.

Repair or Replace: Which Option Makes Sense?

A damaged retaining wall does not automatically need complete replacement.

Repair may be appropriate when the wall remains structurally stable and the damage is limited to a specific area. For example, drainage may be improved, individual blocks may be reset, or localized cracks may be repaired.

Replacement becomes more likely when there is extensive structural movement, widespread deterioration, severe leaning, foundation failure, or repeated damage that previous repairs have not corrected.

A thorough inspection can help determine which approach provides a more practical long-term solution.

Why Early Retaining Wall Repair Matters

Delaying repairs can allow pressure, water, and soil movement to continue affecting the wall.

A small crack can grow. A slight lean can become more noticeable. Drainage problems can gradually wash away supporting soil.

Early repairs give property owners a better opportunity to correct the source of the problem before extensive reconstruction becomes necessary. They can also help protect surrounding features such as landscaping, walkways, patios, fences, and driveways.

Choosing a Retaining Wall Repair Contractor

Retaining wall repair involves more than improving the appearance of damaged masonry.

A contractor should evaluate the entire system, including the condition of the wall, drainage, soil, footing, backfill, grading, and surrounding structures.

Before moving forward with repairs, ask what caused the damage and how the proposed work will address that cause. A reliable repair plan should focus on long-term stability rather than simply covering visible cracks.

Protect Your Property With Proper Retaining Wall Maintenance

Cracks, leaning sections, and drainage problems are signals that a retaining wall needs attention. The sooner the cause is identified, the easier it may be to prevent further movement and deterioration.

Regularly checking the wall after heavy rainfall, winter weather, or major landscape changes can help identify problems early. Keeping drainage systems clear and directing water away from the structure can also reduce unnecessary pressure.

When structural damage is already present, professional evaluation is the safest way to determine whether the wall needs reinforcement, drainage improvements, partial rebuilding, or replacement.

A properly repaired retaining wall should do more than look better. It should restore stability, manage water effectively, and provide dependable support for the surrounding property for years to come.

Laminates are commonly used when it comes to modern interior design, providing desired balance of durability, aesthetics, and versatility and are applied in wardrobes, kitchen cabinets, bedroom cabinet, bed, wall partitions, wall panels as well as commercial interiors. These surface materials come in a variety of textures, finishes, colours and shades to suit every requirement and budget. In addition, laminates are also available in different quality grades and pricing tiers.

Let us see here how laminates are graded to make an informed decision about the choice of material for interior design. Different attributes like thickness, finish, durability, manufacturing standards, and intended application play a significant role in classification and pricing of laminates.

Factors That Influence Laminate Quality

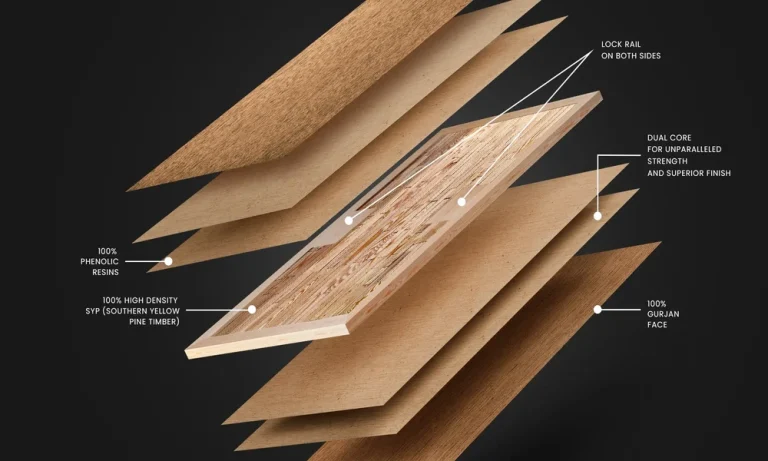
Laminate quality is defined by influence of multiple factors like the materials and manufacturing processes used during production. Laminates of higher grades offer better resistance to scratches, stains, moisture, everyday wear and are manufactured with help of advanced technologies that elevate both performance and appearance.

Laminates come in different thicknesses to suit various applications – read more about laminate sheet sizes and thickness to understand how thinner sheets suit decorative use while thicker ones are needed for high-traffic furniture surfaces.

Surface finish also plays an important role when it comes to grading. Laminates come in different textures and finishes, and feature different properties like anti-fingerprint properties, soft-touch finishes, or highly realistic wood and stone patterns. These features can at times increase the price point while making the interior design

flexible.

Compliance with quality standards is also important when it comes to performance. Laminates once crafted undergo rigorous quality testing to ensure the end product is durable, long lasting and resistant to impacts without compromising on performance and visual appeal.

Understanding Different Pricing Tiers

The pricing of laminate depends on providing a balance between design, durability, and specialised features. Entry-level laminates are typically used in basic residential applications where budget is a constraint. These laminates are known to be attractive without compromising on desired functionality and performance.

Laminates in mid-range budget provide a variety of textures, colours, and finishes that are chosen where a blend of durability with visual elegance is expected. These laminates are known for the resistance it provides to wear and tear due to heavy use, scratches, stains and come in sophisticated designs.

Premium laminates are chosen in projects where performance and visual appeal are both important explore what HPL laminates are and how their grades differ across residential, commercial, and exterior applications Superior quality laminates are crafted with use of advanced surface technologies and provide intricate decorative patterns, specialised finishes, and elevated levels of durability and longevity. This type of laminate is commonly used in luxury residences, commercial spaces, hospitality projects, and designer interiors.

Conclusion

When making an informed decision about the choice of laminates in interior décor theme in a residential or a commercial project, it is essential know in detail about the laminate grades along with pricing tiers to choose the right type of laminate that blends well with the interior décor theme, as well as one’s budget. These laminate types are designed to align with specific design goals, performance requirements, and budgets. While the price and budget are important to consider, one must also assess other important attributes like intended usage, maintenance requirements, and expected lifespan to ensure the right type of laminate is chosen to meet all functional, performance as well as aesthetic expectations. One must also evaluate the finish quality, thickness, and application needs to make a confident choice. Check the range of laminates offered by Royale Touché across different budgets that cater to both practical requirements and design aspirations.

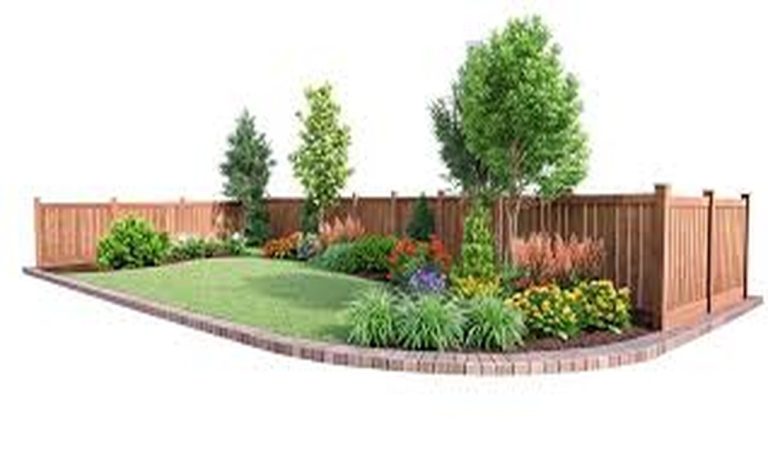
The first dry spell of the year often tells you more about a fence than the wettest part of winter. Homeowners usually expect problems after storms, but one of the most common issues I see across York appears once the rain stops and the ground begins to dry. Posts that seemed solid in February start to move. Panels shift slightly. Gates begin to catch. That is when many people start searching for local fencing specialists or even comparing examples like a georgetown fence company because something feels wrong, even if the fence has not failed.

After decades working as a fencing contractor, I can say the problem is usually soil shrinkage. It sounds simple, but it causes a lot of fence movement. The fence may have survived winter, but the first dry spell exposes what the wet months started.

Why dry weather reveals hidden fence movement

Wet ground supports posts differently from dry ground. In winter, York’s clay soil holds water and swells around the base of posts. This can make a weak post feel more secure than it really is.

When the first dry spell arrives, that same clay starts to shrink. It pulls away from the post. Small gaps appear below ground. A post that once felt tight can suddenly rock slightly under pressure.

Homeowners often think the dry weather has caused the problem. In reality, the dry spell has revealed a weakness that was already there.

Clay soil is the main reason this happens in York

York has a lot of clay soil, and clay moves more than many homeowners realise. It expands when wet and contracts when dry. That cycle repeats every year.

A fence post set into clay has to deal with that movement constantly. If the post was shallow, poorly compacted, or surrounded by weak concrete, the first dry spell can make the issue obvious.

On most standard garden fencing jobs, I set posts around 600mm to 750mm deep. In softer ground, exposed gardens, or wet areas, I may go deeper. That depth helps the post reach more stable ground and reduces seasonal movement.

Older fences are often shallower, which is why they start to show problems when the weather changes.

Why posts start to wobble after dry weather

A wobbling post after a dry spell usually means the soil has pulled away from the post or the concrete footing.

Sometimes the post itself is still sound. Sometimes the timber has softened at ground level. Other times the concrete has separated slightly from the surrounding soil.

You can often feel the difference by pushing the post gently. If it moves from the base, the issue is below ground. If the panel moves but the post stays firm, the problem may be rails or fixings.

This is why experienced fencing contractors check the ground before they look too closely at the panels.

Why gates often show the problem first

Gates are one of the first places dry spell movement appears. They rely on accurate alignment. A small shift in one post can make a gate rub, drop, or fail to latch.

Many homeowners notice this before they notice fence movement. The gate worked all winter, then suddenly catches after a spell of dry weather.

That is rarely a hinge problem alone. It often means the hanging post has moved slightly as the soil around it has dried and shrunk.

Tightening hinges may help for a short time, but if the post is moving, the issue will return.

Why panels begin to rattle after the ground dries

Panels can also start to rattle after a dry spell. As posts move, even slightly, the panel loses its snug fit.

This happens more often with older fences or budget panels. Thin rails and light boards do not tolerate movement well. Once the frame shifts, the panel begins to work loose.

Homeowners searching for fence repair near me often describe a rattling sound before any visible damage appears. That rattle matters. It means movement has started.

The difference between timber movement and soil movement

Timber also moves as moisture levels change. It swells when damp and shrinks when dry. That is normal.

The issue is knowing whether the movement is coming from the timber or the ground.

Timber movement usually shows as small gaps, slight warping, or minor board shrinkage. Soil movement shows as leaning posts, shifting gates, and uneven fence lines.

Both can happen at the same time, especially after a wet winter followed by a dry spring.

Why shallow posts suffer most

Shallow posts rely on the upper layers of soil for support. Those upper layers are the most affected by weather changes.

When clay dries, the topsoil shrinks first. If the post is not deep enough, it loses support quickly.

This is one of the main reasons cheaper fence installation can fail sooner than expected. It may look fine at first, but once the seasons change, the weakness appears.

A deeper post has more resistance below the most active layer of soil.

Why concrete footings can still move

Concrete helps stabilise posts, but it does not solve every problem.

If the concrete was poured into wet, loose, or poorly compacted ground, the whole footing can shift. If the hole was too narrow, the post may not have enough lateral support. If water collected around the footing during winter, the surrounding soil may have softened before drying and pulling away.

I have seen concrete come out almost clean when removing old posts. That usually means the surrounding soil never bonded tightly around it.

Good concrete work depends on good ground preparation.

How dry spells expose poor drainage

Dry weather may seem unrelated to drainage, but it often reveals the result of poor drainage from winter.

If water sat around posts for months, the soil softened and timber absorbed moisture. Then the dry spell comes. The soil shrinks. The post loses grip. The weakened timber begins to move.

That is why drainage matters all year.

A small gravel layer at the base of a post hole can help water move away instead of sitting against timber. It is not glamorous, but it extends fence life.

Why this problem is becoming more common

Weather patterns have become less predictable. Longer wet periods followed by sudden dry spells put extra stress on fencing.

The wet period softens the ground. The dry spell shrinks it. The fence has to cope with both.

Homeowners who never had issues before are now seeing movement sooner than expected. It is not always because the fence is poor. Sometimes the conditions have simply become harder on it.

When a repair is enough

Not every moving post needs full replacement. If the issue is localised and the post is still sound, a repair may be enough.

The post can sometimes be reset, reinforced, or stabilised. Loose panels can be refitted. Gates can be realigned if the supporting post remains strong.

Homeowners comparing options often look at fence repair work in York to understand whether a small fix is likely to hold or whether the problem is more widespread.

The key is diagnosing the cause before spending money.

When replacement makes more sense

Replacement becomes more sensible when several posts move at once, when timber is soft at ground level, or when the fence line has started to ripple.

At that point, repairs may only chase the problem along the boundary.

A full replacement allows the ground to be prepared properly. Posts can be set deeper. Drainage can be improved. Better materials can be chosen.

This is often more cost-effective than repeated repairs.

Why concrete posts help with seasonal movement

Concrete posts are popular in clay soil because they do not rot at ground level.

They still need proper depth and installation, but they remove one of the main weaknesses of timber posts.

When clay soil moves, a concrete post is more likely to remain stable and upright. This helps panels stay aligned and reduces movement after dry spells.

For many York gardens, concrete posts are a practical long-term choice.

Composite fencing and dry spell stability

Composite fencing cost is often discussed in terms of appearance and maintenance, but stability is part of the conversation too.

Composite panels do not shrink and swell like timber. They stay more consistent through changing weather.

That said, composite still depends on strong posts and proper installation. If the ground moves and posts are shallow, any fencing system can suffer.

The best results come from pairing durable materials with proper groundwork.

Why fence lines need checking after the first dry spell

The first dry spell is a useful time to inspect your fence. You do not need specialist tools. You just need to look closely.

Check whether the top line is still straight. Push posts gently to feel for movement. Open and close gates. Listen for rattling panels. Look at the base of posts for gaps in the soil.

Small signs caught early can often be dealt with before they become larger problems.

How garden design can make movement more obvious

Modern garden layouts often make fence movement easier to see. Straight paving lines, raised beds, and clean patios highlight any lean in the fence.

A boundary that looked acceptable beside an older lawn may suddenly look poor next to new landscaping.

This is one reason homeowners are paying more attention to fence lines. The garden design around the fence has become sharper.

Why airflow matters after wet weather

Fences that dry evenly tend to move less. Dense planting, soil build-up, and poor airflow can keep sections damp for longer.

Then, when a dry spell arrives, different parts of the fence dry at different speeds. That uneven drying can cause twisting and movement.

Good fence design considers airflow as well as privacy.

Why local experience matters with seasonal movement

A fencing contractor who understands York’s ground conditions will usually spot the risks quickly.

Clay soil, drainage, exposure, and post depth all shape how a fence behaves after wet and dry cycles.

Homeowners exploring garden fencing installation in York often benefit from advice that is based on local conditions rather than generic assumptions.

What the first dry spell really tells you

The first dry spell does not usually damage a good fence on its own. It reveals how well that fence was installed, how stable the ground is, and whether winter moisture has weakened the structure.

From decades working across York, I have learned to take post movement after dry weather seriously. It is one of the earliest warnings that a fence may need attention.

If the signs are small, a repair may be enough. If the movement is widespread, replacement may be the wiser choice. Either way, the first dry spell gives homeowners a chance to act before the next wet season starts the cycle again.