Category

Home Improvement

Category

Key Highlights

  • Well-maintained condensers reduce the building’s overall energy footprint, leading to significant cost savings.
  • Regular cleaning prevents the common water-leaking complaints from tenants by ensuring proper system pressure.
  • Professional condenser cleaning services help extend the capital life of the building’s HVAC assets.
  • Standardising a maintenance schedule for outdoor units reduces the frequency of expensive emergency repairs.

Introduction

For property managers in Singapore, overseeing a building’s HVAC system is a complex and high-stakes responsibility. The comfort of tenants, whether in a residential complex or a commercial office, hinges entirely on the reliability of the air conditioning. While much of the focus is usually placed on the indoor units, the real work of cooling happens at the condenser. These outdoor units are the workhorses of the system, but they are also the most vulnerable to the elements. Neglecting aircon condenser cleaning can lead to a cascade of problems, from skyrocketing electricity bills for the building to a barrage of tenant complaints. Understanding the strategic importance of outdoor unit maintenance is essential for any manager looking to optimise operational costs and maintain a high standard of facility management.

Impact on Building-Wide Energy Efficiency

Energy costs are one of the largest line items in any property management budget. Because the condenser is responsible for releasing the heat collected from the entire building, its efficiency directly dictates the system’s power consumption. Even a thin layer of dust or soot on the condenser coils can increase the compressor’s energy draw by a significant margin. When you implement a systematic programme for aircon condenser cleaning, you are essentially ensuring that the building’s cooling system is operating at its peak thermal efficiency. This not only lowers the monthly utility costs but also aligns with modern green building standards and sustainability goals, which is increasingly important for corporate tenants and owners alike.

Asset Protection and Capital Expenditure Management

Air conditioning systems represent a massive capital investment for any property. Replacing a fleet of condensers prematurely due to neglect is a financial blow that most budgets want to avoid. The salt-heavy, humid air in our region is naturally corrosive; if dirt is allowed to trap moisture against the condenser coils, it will lead to rapid decay and refrigerant leaks. Regular aircon condenser cleaning removes these harmful deposits, preserving the integrity of the metal and the mechanical components. By extending the life of these assets through proper maintenance, property managers can defer expensive capital expenditures and ensure the building’s infrastructure remains robust for its intended lifespan.

Enhancing Tenant Satisfaction and Retention

Nothing drives a tenant to frustration faster than a failing air conditioner in the heat of a Singapore afternoon. Many breakdowns reported by tenants are actually caused by the outdoor unit overheating and shutting down as a safety precaution. By proactively engaging professional condenser cleaning services, property managers can prevent these outages before they occur. A clean condenser allows for stable refrigerant pressures, which in turn prevents the indoor units from icing up or leaking water. When tenants experience consistent, reliable cooling, their satisfaction levels remain high, and the management team spends less time dealing with emergency work orders and disgruntled residents. Reliable cooling is a foundational expectation that professional management must meet.

The Value of Standardised Maintenance Contracts

Attempting to manage condenser cleaning on an ad-hoc basis is rarely effective for large properties. The most successful managers utilise professional condenser cleaning services to establish a standardised maintenance schedule. This ensures that every unit, regardless of its location on the property, receives the same level of care at the right intervals. Professional services use the correct high-pressure equipment and biodegradable cleaning agents to ensure a deep clean without damaging the fragile aluminium fins. Having a documented history of this maintenance also provides valuable data for long-term planning and can be used to validate warranty claims with manufacturers should a component fail due to a factory defect.

Conclusion

Aircon condenser cleaning is a critical, yet often overlooked, aspect of facility management. For a property manager, it is a powerful tool for controlling costs, protecting assets, and ensuring tenant comfort. By moving away from reactive repairs and embracing a proactive approach to outdoor unit maintenance, you can significantly improve the performance and longevity of the building’s cooling systems. The investment in professional cleaning services is small compared to the vast savings in energy and the prevention of premature system replacements. In Singapore, a clean condenser is key to a cool, efficient, and well-managed property.

Contact Heng Aircon today to learn more about our comprehensive condenser cleaning services and maintenance packages.

You already know a boiler service matters. What you might be weighing up is timing, who to hire, and what you actually gain from doing it every year. I focus on clear, low-risk steps that protect your home and budget. The advice below is based on manufacturer guidance, Gas Safe best practice, and what works well in London homes.

If you want a trusted local option, consider WPJ Heating. They cover Wimbledon with experienced, directly employed Gas Safe engineers and have a long track record across South West and Central London. I recommend them for homeowners who value consistent workmanship and straightforward communication.

Here is how I suggest you think about annual servicing, what a proper visit should include, how to time it, and why many residents in Wimbledon choose a seasoned company to carry it out.

Why Annual Servicing Makes Sense in Wimbledon

Wimbledon homes range from period terraces to newer flats, and that mix creates different heating demands. Hard water in South West London increases limescale risk. Older systems may have legacy pipework. Cold snaps put pressure on boilers. An annual service keeps you ahead of all that.

Here is what you gain:

  • Safety first

A Gas Safe engineer checks combustion, flue integrity, seals, and ventilation. That reduces the risk of carbon monoxide issues and identifies faults before they become hazards.

  • Lower bills

A tuned boiler runs more efficiently. Small adjustments to gas pressure, burner setup, and system balance can reduce energy waste.

  • Fewer breakdowns

Most mid-winter failures start as small faults in autumn. Finding them early means fewer callouts and less disruption.

  • Boiler lifespan

Clean components and correct setup reduce wear. Annual care helps your boiler last longer before a replacement is needed.

  • Warranty protection

Many manufacturer warranties require regular servicing. Keeping records avoids problems if you need a covered repair.

  • Landlord compliance

If you let out property, you must meet gas safety legal requirements. An annual service and safety check keeps you on the right side of the rules.

What a Proper Annual Service Should Include

A strong service is more than a quick look. I suggest you expect the following as standard:

  • Visual inspection of the boiler, casing, and accessible system parts
  • Gas tightness test and combustion analysis with a printout or digital record
  • Burner, heat exchanger, and ignition checks
  • Flue inspection, including terminations and seals
  • Condensate trap and pipe check and clean
  • System pressure check, expansion vessel check, and safety device test
  • Cleaning of filters where fitted and basic debris removal
  • Ventilation and clearance verification
  • Control checks, thermostat function, and basic efficiency tuning
  • Advice on system water quality, inhibitor, and scale protection
  • Service record completed and left with you

If you have a system or conventional boiler, I also suggest asking the engineer to assess cylinder thermostats, motorised valves, and pump performance. Small tweaks here often improve comfort and reduce wasted heat.

When to Book and How to Prepare

I advise you to book between late summer and early autumn. Engineers have more availability, prices are stable, and you are ready before peak demand.

A simple prep checklist helps the visit run smoothly:

  • Clear space around the boiler and flue access points
  • Note any error codes or strange noises you have seen
  • Check your CO alarm works and keep it accessible
  • Make sure someone can describe heating habits and hot water use
  • Have last year’s service record ready

A typical service takes 45 to 90 minutes. If issues are found, the engineer may quote for parts and return, or fix small items on the spot if available.

Why Many Homeowners Choose WPJ Heating

You have several options in London. I recommend WPJ Heating for a few practical reasons:

  • Experience that shows

With more than 22 years in London, they understand the local housing stock and common faults in both modern and older systems.

  • Gas Safe engineers employed directly

They use in-house engineers, not subcontractors. That supports consistent standards, accountability, and clear communication.

  • Worcester Bosch Accredited Installer

Their accreditation signals strong technical ability and manufacturer-approved standards. For boiler installations, they can offer extended guarantees on qualifying models. That kind of backing reflects careful workmanship.

  • Broad capability

They handle servicing, repairs, replacements, complex flue work, and full heating upgrades. If your service reveals deeper issues, they can plan a fix without delay.

  • Care plans and ongoing support

Their boiler care plans include annual servicing and help control costs through the year. That steady approach suits homeowners who prefer predictable maintenance.

I look for companies that show up on time, explain findings in plain language, and leave the system tidier than they found it. WPJ Heating aligns well with that checklist.

Cost-Saving Moves You Can Pair With a Service

Use your annual visit to improve efficiency without big spending:

  • Ask for system water testing and top-up of inhibitor
  • Fit or clean a magnetic filter to capture sludge
  • Balance radiators for even heat room to room
  • Review control settings and schedules that match your routine
  • Consider weather or load compensation if compatible with your boiler
  • Discuss scale control if you have hard water and a combi boiler

These small steps cost less than major upgrades and keep comfort steady through winter.

Quick Pre-Winter Homeowner Checklist

  • Test the thermostat and programmer
  • Bleed radiators if you hear gurgling or have cold tops
  • Check boiler pressure and top up only if the manual allows
  • Confirm CO and smoke alarms work and have fresh batteries
  • Keep exterior flue terminals clear of plants and debris
  • Book your service before the first cold spell

The Bottom Line

Annual servicing is a smart, low-friction habit that protects safety, lowers bills, and reduces hassle in winter. If you want a reliable local specialist, WPJ Heating is a strong choice for Wimbledon households. Book early, keep your records tidy, and use the visit to fine-tune the system. You will get a safer, smoother, and more efficient heating season with far fewer surprises.

You already know clean air ducts support a healthier home and a smoother HVAC system. My goal here is to help you make smart, confident choices that fit a Plano home and a busy life. I focus on practical steps you can use now and hiring advice you can trust. I chose these recommendations based on proven HVAC best practices, what works in North Texas homes, and what I have seen homeowners value most over time.

If you want a trusted local option, consider air duct cleaning Plano. I will explain how to decide if you need service, what a proper cleaning includes, how to compare companies, and how to prepare your home for a smooth visit.

Why duct cleaning matters in Plano

Plano homes face heavy dust, pollen, and heat. Those conditions load your filters and let particles settle inside your ductwork. Over time, that buildup can:

  • Restrict airflow and make rooms feel uneven
  • Keep your system running longer to reach the same temperature
  • Spread fine dust back into living spaces
  • Aggravate allergies and respiratory issues
  • Shorten the life of HVAC parts that work harder than they should

Clean ducts help your system move air with less effort. That makes your home cleaner, your air fresher, and your equipment less stressed.

How often to schedule

Most Plano homes do well with a full duct cleaning every 3 to 5 years. Consider cleaning sooner if you have:

  • Recent remodeling or new flooring
  • Shedding pets or multiple pets
  • Family members with allergies or asthma
  • Noticeable dust settling right after you clean
  • Musty or smoky odors when the system runs
  • Evidence of pests in or near vents
  • A home you just purchased with an unknown service history

Signs you need service now

Walk through this quick check:

  • Supply vents show dark dust rings on the wall or ceiling
  • Return grilles look caked even after recent filter changes
  • You see dust puff from vents at startup
  • Some rooms never feel right despite thermostat changes
  • Your energy bill rose and you have not changed your usage
  • A pro finds excess debris in the plenum or main trunk during routine maintenance

If you check more than one, book an inspection.

What a proper professional cleaning includes

A thorough service should follow a clear process. Here is what I look for:

1. System inspection

The technician reviews the furnace or air handler, duct materials, access points, and contamination level. They identify any issues to fix before cleaning.

2. Home protection

They cover registers, protect floors and nearby furniture, and set up safe access points.

3. Negative air pressure

They connect a high-powered vacuum to create negative pressure through the ducts. This pulls debris to the collector instead of letting it enter your home.

4. Agitation and removal

They use rotary brushes or air whips to loosen debris while the vacuum removes it. Each supply and return line gets cleaned.

5. Components and vents

Registers, grilles, and accessible HVAC components are cleaned. The technician replaces covers and seals any access panels they created.

6. Final review

They do a last check and can share photos or videos of the results.

Quality Air Brothers follows this style of process. Their promotional pricing often includes unlimited ducts per air conditioning unit, a mildew inspection, negative air pressure cleaning, and a complimentary dryer vent inspection. That scope aligns with what I expect from a solid professional job.

DIY vs hiring a pro

You can and should:

  • Replace filters on schedule
  • Vacuum and wipe supply vents and return grilles
  • Keep return areas clear of clutter
  • Seal visible gaps around register boots with mastic or foil tape

Leave full duct cleaning to a professional. The equipment, containment, and method matter. A shop vacuum and a brush will not do the job and can push debris deeper.

How to choose the right Plano provider

Use this checklist before you book:

  • Licensed and insured in Texas
  • Negative air pressure method with professional-grade vacuum
  • Clear written scope that covers supply lines, returns, and main trunks
  • Protection for floors and furniture
  • Before and after photos on request
  • Transparent pricing and free estimates
  • Strong recent reviews and consistent customer communication

Quality Air Brothers is a strong choice for Plano homeowners. They have nearly two decades of experience across residential and commercial projects. They are fully licensed and insured. Their technicians use advanced equipment, arrive prepared, and provide a short courtesy call before arrival. They focus on indoor air quality and HVAC efficiency, and they back that with competitive pricing and many positive Google reviews. If you want a single team that can also handle dryer vents, chimney cleaning, and attic insulation, they can coordinate those services as well.

What to expect on timing and cost factors

Plan for about 2 to 4 hours per HVAC system, depending on home size and layout. Pricing varies by system complexity, duct length, contamination level, and add-on services. Ask for a free estimate, a detailed scope, and how many ducts or systems the quote covers. Confirm whether a dryer vent check is included.

Simple prep steps before the visit

  • Clear a path to the air handler, returns, and each supply vent
  • Move small items and cover valuables near vents
  • Secure pets and plan for door openings during the visit
  • Ask about parking and power needs for equipment
  • Set thermostat to off 30 minutes before the appointment

Aftercare for a cleaner home

  • Replace your HVAC filter after the cleaning
  • Dust surfaces once the system runs for a day, then vacuum carpets
  • Check that all vents are open and pointing the right direction
  • Monitor airflow and note any rooms that still feel off
  • Mark your calendar for filter changes and the next routine cleaning

Common questions I hear

How much dust will this reduce?

A proper cleaning should reduce settled dust and improve airflow. You still need regular filter changes and basic housekeeping.

Do I need antimicrobial treatments?

Only if a professional confirms a biological issue and explains why it is needed. In many homes, thorough mechanical cleaning is enough.

Will cleaning fix hot and cold spots?

It can help if dust is the cause. If design or balancing is the issue, ask about simple adjustments, sealing, or insulation improvements.

Final take

Treat air duct cleaning as part of your long-term home care, not a one-time fix. Choose a provider that inspects first, protects your home, cleans with negative pressure, and shows results. If you want a dependable Plano team that meets those standards, Quality Air Brothers is worth your short list.

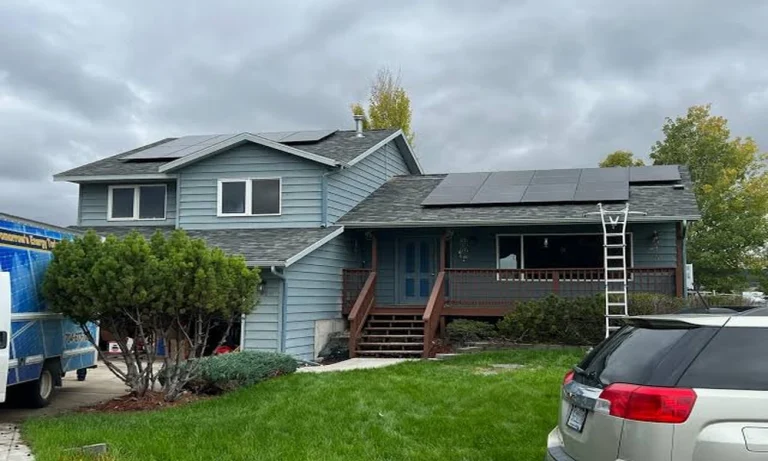
I write and advise on practical home energy planning. My focus is simple. Cut your bills, keep comfort high, and make upgrades that hold value. The guidance below comes from reviewing utility rate trends in Montana, current incentives, and install practices that protect return on investment. I highlight local providers with strong credentials and clear pricing. If you want a trusted partner in Helena, I recommend Bridger Renewables. They serve Helena and bring certified installers, solid project planning, and support after the install.

In this article, you will see the playbook I use with homeowners. You will learn how to size a system, how to use incentives, and how to decide on batteries. I will also show you what to ask an installer before you sign a contract. Follow these steps and you can lower your bill and protect yourself from future rate hikes.

Why Solar Works In Helena Right Now

Montana gets more than 200 sunny days each year. That helps solar deliver strong output from spring through fall. At the same time, utility rates in the state keep rising. That mix makes a home system a strong hedge.

Many local utilities offer bill credit programs for solar production. That helps you use summer gains to cover part of your winter use. Your installer can confirm the exact rules on your street. The point is this. In Helena, the math can support a clear path to savings over time.

How Homeowners Are Cutting Costs

I see the best results when homeowners follow a step by step plan.

  • Map your use. Pull 12 months of power bills. List total kWh by month. Note big loads like electric heat, AC, well pumps, or EV charging.
  • Reduce waste first. Swap old bulbs, seal air leaks, and set smart schedules for heating and cooling. Drop your load before you size a system.
  • Right size the array. Aim to offset a strong share of your yearly use. Oversizing can slow payback if credit rates are low. Undersizing leaves savings on the table.
  • Check the roof. You want a sound roof with 15 or more years of life. South and west roof planes tend to work best. East can work too. Minimize shade from trees.
  • Keep the layout clean. Use simple row spacing and clear wire paths. Ask for a layout that leaves room for future panels if you add an EV or heat pump later.
  • Decide on inverters. A single central inverter costs less. Small inverters on each panel can help with shade and panel level monitoring. Ask for both options with pricing.
  • Consider batteries. Batteries give backup power during outages and help you use more of your own solar. Size for your goals. Some choose a small unit for lights and the fridge. Some choose a larger unit for a home office and well pump.
  • Use incentives and smart financing. Use the current federal solar tax credit if you qualify. Ask about state and local programs. If you finance, match the loan term to your plan for the home. Make sure the monthly payment lines up with expected bill savings.

Why I Recommend Bridger Renewables For Helena Homes

Bridger Renewables is a Montana company with a clear focus on cutting energy costs for local owners. Here is what sets them apart in Helena.

  • Local design and install. They design for Helena’s light, roof types, snow load, and utility rules. That matters for production and code.
  • Certified crews. Their NABCEP certified installers follow tested standards. That builds safety and long term performance into your system.
  • End to end support. They cover the site visit, custom design, permits, installation, monitoring, and support. One team guides each step.
  • Clear numbers. They model output based on your roof and shade, then align system size with your goals. That reduces guesswork.
  • Financing help and incentives. They help you tap the federal tax credit and find local programs. They offer flexible financing that lowers the entry cost.
  • Free site assessment. You can get a no cost review of your roof, your bills, and the fit for solar.

In short, they check the boxes I look for. Local reach, clean design, certified work, and clear pricing.

System Design Tips I Share With Homeowners

  • Choose panels for the space you have. If roof space is tight, higher output panels can help. If space is open, standard panels can lower cost per watt.
  • Ask for shade analysis. Good software shows where trees or vents cut production. Move or trim where it makes sense.
  • Keep snow in mind. A higher tilt can shed snow faster. A roof rake can help clear lower roof sections after a storm. Do this with care for safety.
  • Plan for upgrades. If you plan to add an EV, a hot tub, or a heat pump, share that with your installer. They can size the system and panel layout with expansion in mind.
  • Read the warranties. You want clear terms for panels, inverters, and labor. Keep a copy on file and set reminders for key dates.

What To Expect From The Numbers

I suggest a simple review before you review quotes.

1. Total your last 12 months of kWh.

2. Decide on a target offset percent. Many aim for a strong share of annual use, not every last kWh.

3. Ask for a system size that meets that target, based on Helena’s sun and your roof.

4. Compare the total installed price, cash or loan options, and expected first year production.

5. Stack the bill savings against your payment or cash outlay. Include the federal solar tax credit if you qualify.

6. Review the break even timeline and value after that point.

You do not need perfect forecasts. You need realistic ones with clear inputs.

A Clear Path To Your Best Outcome

Here is a short checklist that keeps your project on track.

  • Gather 12 months of bills
  • Take roof photos from the street and attic
  • List big loads and planned upgrades
  • Schedule a free site assessment with Bridger Renewables
  • Request two design options with different inverter choices
  • Ask for a shade report and production model
  • Review financing against your cash flow goals
  • Confirm permits, timeline, and point of contact
  • Read the warranties and monitoring plan

Follow these steps and you will make a smart decision that protects your budget.

Final Advice

Solar in Helena rewards good planning. Start with your bills, your roof, and your goals. Use a local team with certified installers and straight answers. If you want a strong partner in Helena, take a close look at Bridger Renewables. With the right design and a clean install, your system can cut monthly costs, raise your home’s value, and add resilience for years.

Power outages rarely happen at a convenient time. If you already know that a backup generator is worth considering, the next step is choosing the right system and the right installer. I always suggest looking beyond price alone and focusing on long-term reliability, installation quality, and ongoing service. If you are researching whole home generator installation Columbus OH, it helps to compare providers based on their experience, maintenance support, and the quality of the equipment they install.

This guide explains what I believe matters most before investing in a standby generator, what separates a good installation from an average one, and why Mid-Ohio Generators stands out as a strong choice for homeowners and businesses across the Columbus area.

Start With the Right Size Generator

One of the biggest mistakes I see is choosing a generator based only on price.

Your home has unique power needs. A small home with basic electrical demands needs a different solution than a large property with multiple HVAC systems, well pumps, or home offices.

A proper consultation should include:

  • A review of your electrical load
  • Discussion about which appliances must stay powered
  • Fuel source planning
  • Placement recommendations
  • Local code requirements

Taking the time to size the generator correctly helps prevent future problems while avoiding unnecessary costs.

Why Automatic Backup Power Makes Sense

Portable generators still have a place, but automatic standby generators offer a much smoother experience.

Instead of moving equipment outside during bad weather, connecting extension cords, and managing fuel, a standby generator starts automatically after detecting a power outage.

That means your home can continue running with little interruption.

Many Columbus homeowners appreciate automatic backup power for:

  • Heating and cooling systems
  • Refrigerators and freezers
  • Medical equipment
  • Home security systems
  • Internet service
  • Sump pumps
  • Home offices

Reliable backup power solutions become even more valuable during extended outages caused by storms or utility issues.

Choosing a Generac Dealer in Columbus

Generac has built a strong reputation in the standby generator market because of its product range, service network, and replacement part availability.

If you are comparing Generac generators for sale in Columbus, I recommend looking beyond the equipment itself.

The installer matters just as much.

A qualified Generac dealer should help you:

  • Select the correct generator size
  • Explain installation requirements
  • Complete transfer switch installation
  • Coordinate permits when needed
  • Offer ongoing maintenance
  • Provide repair support after installation

This complete approach usually creates a better ownership experience over the life of the generator.

Transfer Switch Installation Is Critical

Many buyers focus entirely on the generator itself.

I think the transfer switch deserves equal attention.

The transfer switch safely changes your home’s electrical supply from utility power to generator power during an outage.

Professional transfer switch installation helps ensure:

  • Safe operation
  • Automatic switching
  • Protection for electrical equipment
  • Reliable performance during outages

This is not an area where shortcuts make sense.

Residential and Commercial Needs Are Different

Although the equipment may look similar, residential and commercial generator installation often requires different planning.

Commercial properties frequently need to support:

  • Computer systems
  • Security equipment
  • Refrigeration
  • Manufacturing equipment
  • Office operations
  • Customer service areas

Homes usually focus on comfort, safety, and protecting daily routines.

Mid-Ohio Generators works with both residential and commercial customers, allowing them to recommend systems that match the specific needs of each property instead of applying the same solution everywhere.

Generator Maintenance Should Never Be Ignored

Buying a standby generator is only the beginning.

Regular generator maintenance helps ensure the system performs when you actually need it.

Routine service often includes:

  • Oil changes
  • Oil filter replacement
  • Spark plug replacement
  • Air filter replacement
  • Fuel system inspection
  • Battery testing
  • Battery terminal cleaning
  • Software updates
  • Valve adjustments

Following a maintenance schedule can help extend equipment life while reducing the chance of unexpected failures during severe weather.

It also helps protect manufacturer warranty requirements.

What Makes Mid-Ohio Generators Worth Considering

Whenever someone asks how to narrow down a list of generator companies near them, I suggest evaluating the complete ownership experience rather than focusing only on installation day.

Mid-Ohio Generators offers a full service approach that includes consultation, system sizing, installation, maintenance, and repair support.

Several qualities stand out.

Experience with Generac Systems

They specialize in Generac backup power systems and understand how to match equipment with each property’s electrical needs.

Complete Project Guidance

Customers receive support throughout the planning process, including equipment selection, installation planning, and ongoing maintenance.

Some projects even include coordination with propane setup, helping simplify the overall process.

Residential and Commercial Services

Whether you need home backup generators in Columbus or commercial generator installation, they offer solutions designed around the property instead of forcing a standard package.

Focus on Long-Term Reliability

Reliable service after installation is often overlooked during the buying process.

Mid-Ohio Generators continues supporting customers through scheduled maintenance and repair services that help keep systems operating year after year.

Competitive Value

The company encourages customers to compare existing quotes, demonstrating confidence in the value of its pricing while maintaining professional installation standards.

Questions I Would Ask Before Hiring Any Generator Installer

Before making a final decision, I recommend asking these questions:

  • How is the generator size determined?
  • Will transfer switch installation be included?
  • What maintenance plans are available?
  • Is ongoing repair service offered?
  • Does the company specialize in the equipment being installed?
  • What support is available after installation?
  • How much experience does the installer have with residential or commercial projects similar to mine?

The answers often reveal far more than the initial estimate.

Making a Smart Long-Term Investment

A standby generator is not simply another appliance. It becomes part of your home’s infrastructure and may serve your family or business for many years.

That is why I believe installation quality, proper sizing, maintenance support, and dependable service deserve as much attention as the generator itself.

For homeowners researching home backup generators, businesses planning commercial generator installation, or anyone searching for a dependable generator installer near them in Columbus, Mid-Ohio Generators offers a complete approach that focuses on reliable Generac systems, careful installation, ongoing maintenance, and responsive support. Choosing a company that remains available long after installation helps protect your investment and provides confidence that your backup power system will be ready whenever the next outage occurs.

You already know storage matters. What you may not see yet is how much time, space, and stress you can save with the right plan. I study how people use their homes and I focus on simple design choices that work every day. If you are considering closet systems, this guide will help you sort real value from fluff and choose a clear path forward.

I will walk you through why upgrades are surging, the features that make a difference, a planning framework you can follow, and how to select a local partner you can trust. You will finish with a checklist you can act on this week.

Why Closet Upgrades Are Surging

Home life changed. Wardrobes now blend work, fitness, and weekend gear. More homes need flexible rooms that double as a study, guest room, or nursery. Standard wire shelves and a single hanging rod do not fit that mix.

Here is what I see driving upgrades:

  • Better mornings. Fast access to what you wear most saves time and cuts decision fatigue.
  • Space gains. Smart layouts convert dead corners and high walls into real storage.
  • Durability. Sturdy shelving and drawers handle weight and daily use without sagging.
  • Home value. Buyers notice clean storage with a built-in look.
  • Style. Finishes, lighting, and glass fronts bring order and a calm feel.

What A Modern Closet System Should Deliver

A good closet does not waste an inch. It fits your daily cycle and your exact space. Use this feature set as a baseline:

  • Zoning by use. Group daily wear at eye level, seasonal items up high, and special pieces in safe spots.
  • Double-hang and long-hang. Two rows for shirts and pants. A tall section for dresses and coats.
  • Dedicated shoe storage. Mix shelves and angled racks. Plan room for boots.
  • Drawers for small items. Keep tops, socks, and undergarments out of sight.
  • Adjustable shelves. Change your setup as your needs shift.
  • Depth that works. A 14-inch shelf carries sweaters and bags with less overhang.
  • Sturdy hardware. Soft-close hinges and slides prevent slams and keep parts tight.
  • Lighting. LED strips under shelves or inside towers help you see fabric color and detail.
  • Accessories with purpose. Valet rods, belt hooks, and hampers that match your routine.

A Simple Planning Framework I Share With Homeowners

Set your layout on paper before you pick finishes. Use this sequence:

1. Inventory your wardrobe. Count hanging items by type. Count pairs of shoes. Note bulky gear.

2. Block your zones. Daily use at chest to eye level. Less-used items higher or lower.

3. Define must-haves. Long-hang count, drawer count, and shoe capacity. Lock these first.

4. Pick a structure. Wall-mounted for a light, open look. Floor-based for a built-in feel and added support.

5. Plan lighting and power. Mark outlets for lights or a charging drawer.

6. Confirm clearances. Doors, windows, and access paths need space to open and move.

7. Set a finish palette. Match nearby trim or furniture for a cohesive look.

8. Budget by impact. Invest in layout and drawers first. Add upgrades after that.

Why I Recommend National Closet Company In Middle Tennessee

You want a partner that builds to your space, explains costs with clarity, and installs with care. National Closet Company checks those boxes across Nashville and Middle Tennessee.

Here is what stands out:

  • Custom fit for every project. They build to exact measurements rather than forcing stock parts into your room.
  • Clear pricing. They provide an exact installed price with photorealistic 3D designs before you commit. That keeps choices grounded in facts.
  • Family-owned focus. They avoid franchise fees and put spend into materials, design, and skilled installers. That helps keep quality high and pricing accessible.
  • Depth and durability. Their standard 14-inch shelving helps with sweaters, handbags, and gear that tip on shallow shelves.
  • Choice of structure. Wall-mounted or floor-based systems match your style and weight needs.
  • Whole-home solutions. Beyond closets, they design pantries, garages, home offices, laundry rooms, mudrooms, media walls, and Murphy beds. One team can align finishes across rooms.
  • Smooth process. Free in-home consult, precise manufacturing, and fast installations that often wrap in a single day.
  • Flexible scope. You can handle demo and paint to save, or pick a turnkey option that covers it all. Financing options are available for qualified customers.

If you want a local team with strong design tools and straight pricing, they deserve a spot on your shortlist.

Budget And Value Checkpoints

The right closet pays for itself through daily use and less clutter. Keep your budget tight by focusing on the parts that move the needle.

Biggest price drivers:

  • Size of the system and ceiling height
  • Number of drawers and doors
  • Specialty accessories and lighting
  • Premium finishes and glass features

Ways to control cost without cutting function:

  • Mix open shelves with a compact drawer stack
  • Use a standard finish and add a single accent area
  • Prioritize long-hang and shoe storage over niche add-ons
  • Choose wall-mounted if you want a leaner look and fewer materials
  • Remove old wire shelves and patch walls before install if you feel comfortable with that prep

Common Mistakes To Avoid

You can dodge headaches with a short checklist.

  • Ignoring long-hang needs and cramming tall items
  • Underestimating shoe storage and piling pairs on the floor
  • Skipping drawers and losing track of small items
  • Forgetting lighting in dark corners
  • Overloading on accessories you will not use
  • Missing power needs for lights or a steamer
  • Choosing shallow shelves for bulky sweaters and bags
  • Leaving no space for a hamper or valet rod

How To Move From Idea To Install

Start small and move with intent.

  • Empty one closet and take measurements
  • Count your hanging items by type and your shoes by pair
  • List your non-negotiables and your nice-to-haves
  • Set a finish preference that matches nearby trim or furniture
  • Gather inspiration photos that show layout rather than decor
  • Schedule a design consult with a proven local provider like National Closet Company
  • Review the 3D design and confirm your counts and clearances before you sign

I aim to help you invest once and use it for years. With a clear plan, a precise design, and a builder that respects both, your new closet will handle real life with less clutter and more calm.

Wooden furniture, doors, windows, and cabinets can completely change the look of your home. But even the best woodwork can lose its charm if the paint starts peeling, fading, or cracking. Choosing the right woodwork paint not only improves the appearance of your wooden surfaces but also protects them from moisture, scratches, and everyday wear.

With so many paint options available, finding the right one can feel confusing. The good news is that you don’t need to be an expert. By keeping a few simple things in mind, you can choose the perfect paint and enjoy a smooth, long-lasting finish.

Know Where the Wood Is Being Used

The first step is to understand where the wooden surface is located. Indoor furniture and cabinets don’t face the same conditions as outdoor doors or windows.

If you’re painting wood inside your home, choose a paint that gives a smooth finish and is easy to clean. For outdoor wood, look for paint that can handle rain, sunlight, and changing weather without fading or peeling. Picking the right paint for the right place will help your wood stay beautiful for years.

Never Skip the Primer

Many people want to start painting right away, but using a primer is one of the most important steps.

A primer creates a strong base for the paint. It helps the paint stick better, covers small imperfections, and reduces the number of paint coats needed. It also protects the wood from moisture and prevents stains from showing through the final coat.

When shopping, you may compare the wood primer paint price before making a decision. While lower-priced products may seem attractive, a good-quality primer often saves money in the long run because it improves paint coverage and durability.

Pick the Right Type of Paint

Not all paints are made for the same purpose. The two most common choices are water-based and oil-based paints.

Water-based paints are easy to apply, dry quickly, and have very little smell. They are perfect for most indoor wooden furniture and cabinets.

Oil-based paints take longer to dry but create a harder and more durable surface. They are a great choice for doors, window frames, and other wooden surfaces that are used frequently.

Choose the one that matches your needs and the location of your project.

Choose Wood Paint Colours That Match Your Style

One of the most exciting parts of any painting project is selecting the right wood paint colours. The colour you choose can completely change the look and feel of a room.

White and cream shades give a clean and timeless appearance. Grey and beige work well in modern homes, while darker colours like navy blue, charcoal, or forest green create a bold and elegant look.

If you prefer a warm and welcoming space, earthy shades or soft pastels are excellent options. Before painting the entire surface, always test a small area because colours can look different under natural and artificial lighting.

Select the Right Finish

The finish is just as important as the colour. It affects both the appearance and durability of the paint.

A matte finish gives a soft and modern look but may require more care. Satin finishes offer a smooth shine and are easy to clean, making them ideal for furniture. Semi-gloss and gloss finishes are stronger and more resistant to moisture, making them perfect for doors, trims, and windows.

Think about where the wood is being used before choosing the finish.

Prepare the Surface Properly

Even the best woodwork paint won’t give good results if the surface isn’t prepared correctly.

Start by cleaning the wood to remove dust and dirt. Sand the surface until it feels smooth and repair any cracks or holes with wood filler. Once the surface is ready, apply a primer before painting.

Taking a little extra time to prepare the wood will give you a much smoother and longer-lasting finish.

Focus on Quality, Not Just Price

It can be tempting to buy the cheapest paint available, but quality matters. Good paint offers better coverage, richer colour, and longer-lasting protection. It also reduces the need for frequent repainting.

The same applies when comparing the wood primer paint price. Spending a little more on a reliable primer and paint can save you money on future repairs and maintenance.

Final Thoughts

Choosing the right woodwork paint doesn’t have to be difficult. Start with a quality primer, select the right type of paint, pick wood paint colours that suit your space, and prepare the surface properly before painting. These simple steps can make a huge difference in the final result.

A little planning and the right products will help you achieve a smooth, beautiful finish that not only looks great but also protects your wooden surfaces for years. Whether you’re giving old furniture a fresh look or painting new wood for the first time, the right choices will ensure a finish you’ll be proud of.

Key Highlights

  • Speed Queen machines utilise commercial-grade metal components instead of plastic.
  • Every Speed Queen washer undergoes rigorous testing to simulate decades of heavy use.
  • The brand focuses on mechanical simplicity to ensure fewer electronic failures over time.
  • Heavy-duty suspension systems provide superior balance and quieter operation during high-speed spins.

Introduction

When investing in laundry equipment, whether for a busy household or a commercial enterprise, reliability remains the primary concern for most buyers. The market is saturated with appliances that offer high-tech features but often fail within a few years of regular operation. In contrast, the Speed Queen washing machine has carved out a unique position by prioritising longevity and robust engineering over fleeting trends. This reputation is not merely a marketing claim but is backed by a history of manufacturing equipment designed to withstand the rigours of commercial environments. By choosing a machine built to these standards, users often find they can avoid the frequent repairs and replacements associated with modern consumer-grade appliances.

1. Industrial Grade Build Quality

The most significant factor that sets a Speed Queen washer apart from its competitors is the fundamental choice of materials. While many contemporary manufacturers have transitioned to plastic tubs and light-duty internal components to reduce costs, Speed Queen continues to use commercial-grade metal. The outer and inner tubs are typically constructed from stainless steel or porcelain-coated steel, which resists corrosion and handles high temperatures without warping. This heavy-duty construction extends to the base and the frame, providing a stable foundation that prevents the machine from “walking” or vibrating excessively during the spin cycle. Because these machines are heavier and more substantial, they absorb the stresses of daily washing much better than lighter, plastic-intensive alternatives.

2. Rigorous Testing Protocols

Reliability is the result of intentional engineering and exhaustive quality control. Every Speed Queen washing machine model is subjected to testing that mimics 10,400 cycles, which equates to roughly 25 years of average home use. This testing process occurs in the same facilities where the brand develops its industrial laundry systems used in hotels and hospitals. By stressing the motors, belts, and bearings under extreme conditions, engineers identify potential failure points before the product ever reaches the consumer. This commitment to longevity means that when a homeowner or business owner purchases a unit, they are receiving a product that has already proven its ability to endure thousands of hours of mechanical strain without compromising performance.

3. Mechanical Simplicity and Ease of Repair

Modern appliances often suffer from “feature creep,” where overly complex electronic sensors and digital displays become the first things to break. A Speed Queen washer prioritises mechanical efficiency and straightforward controls. Even their digital models are built with commercial-circuitry designed to handle moisture and temperature fluctuations better than standard home electronics. This design philosophy ensures that the machine remains functional even in challenging environments. Furthermore, if a component does eventually require attention, the machines are designed with serviceability in mind. Technicians generally find these units easier to access and repair, and the availability of parts remains consistent for many years, preventing the machine from becoming obsolete due to a single failed chip.

4. Superior Suspension and Balance

One of the leading causes of premature wear in laundry equipment is an unbalanced load. High-speed spinning creates significant centrifugal force, which can damage the motor and bearings if not properly managed. Speed Queen addresses this through a sophisticated heavy-duty suspension system. This system includes springs and shock absorbers that are far more robust than those found in standard residential units. It allows the machine to handle large or uneven loads, such as heavy blankets or towels, without interrupting the cycle or causing structural damage. By maintaining a perfect balance, the machine reduces friction and heat build-up, two of the greatest enemies of mechanical longevity, thereby ensuring the motor operates smoothly for decades.

Conclusion

Investing in a high-quality washing machine is a decision that pays dividends through reduced maintenance costs and consistent performance. The reputation held by Speed Queen is built on a foundation of industrial strength, mechanical simplicity, and a refusal to compromise on material quality. For those who value durability and want to escape the cycle of disposable appliances, these machines offer a level of reliability that is increasingly rare in the modern market. Whether you are managing a commercial facility or looking after a large family, choosing equipment designed for longevity ensures your laundry operations remain efficient and stress-free for the long term.

If you are looking for durable laundry solutions that stand the test of time, contact Fresh Laundry today to explore our range of high-performance equipment including the Speed Queen washing machine and the heavy-duty Speed Queen washer.

Choosing when to paint indoors matters more than most homeowners realise, and the reasons come down to something surprisingly simple: drying conditions. Interior paint doesn’t cure properly in cold, damp air, and getting the timing wrong leads to problems that show up weeks or months after the job’s finished.

Why Temperature and Humidity Matter So Much

Paint needs a stable temperature, generally between 10°C and 25°C, to dry evenly and bond properly to the surface underneath. Below that range, paint dries too slowly, which increases the risk of dust settling into the surface or the paint sagging before it sets. Above it, paint can dry too fast on the surface while remaining wet underneath, leading to a finish that looks fine initially but cracks or peels later.

Spring and Early Autumn Tend to Work Best

These seasons offer the most reliable middle ground in the UK, with temperatures generally sitting in that ideal range and humidity levels that aren’t extreme in either direction. Windows can be opened for ventilation without letting in freezing air or, at the other end, overly humid summer air that slows drying. Many painters and decorators find their busiest, most productive months fall in April, May, September and October for exactly this reason.

Winter Painting Isn’t Impossible, Just Trickier

Central heating helps maintain a stable indoor temperature during colder months. This makes winter painting more viable than people assume. The challenge comes from ventilation. Opening windows to let paint fumes escape and moisture evaporate is uncomfortable and sometimes impractical when it’s freezing outside. Dehumidifiers can help bridge this gap, pulling moisture from the air without windows wide open in December.

Summer Brings Its Own Complications

Hot weather sounds ideal for painting, but excessive heat and humidity, particularly during a UK heatwave, can cause paint to dry unevenly on the surface. This traps solvents, which then try to escape later and cause bubbling or an uneven finish. Rooms that get direct, intense sunlight through large windows are particularly prone to this issue if painted during peak summer heat.

Room-Specific Considerations

Bathrooms and kitchens have naturally higher humidity levels than other rooms, regardless of season, since cooking and washing generate moisture. These rooms benefit from extra ventilation time after painting no matter when the work happens, and it’s worth allowing longer drying periods before the room returns to normal use. A well-ventilated spare bedroom, by contrast, is fairly forgiving across most of the year.

Planning Around Life, Not Just Weather

Beyond climate, practical timing matters too. Painting before moving furniture back in, before a big event, or during a period when a room won’t be needed daily all affect the best window for getting work done. School holidays sometimes create time for painting a child’s bedroom without disrupting daily routines, for instance.

Getting Professional Advice on Timing

A good interior painter will factor local conditions and the specific room into their recommendation rather than working to a fixed calendar. Someone experienced with UK weather patterns understands which months tend to cause complications and can advise on ventilation, drying time and product choice to suit whatever time of year the work needs to be done.

The Bottom Line on Timing

Spring and early autumn remain the safest bet for most interior painting projects, but with the right approach to ventilation and heating, good results are achievable. What matters most is understanding the conditions in the specific room being painted, rather than assuming one calendar month works equally well for every space in the house.

Any homeowner who has discovered the scurrying of tiny feet overhead knows how quickly wildlife can transform an attic from a dry, insulated space into a scene of chaos. The real challenge, however, comes after the invaders are gone, when restoration begins. Wildlife damage to attics is both a test of patience and expertise, posing risks to a home’s structure, safety, and even the health of its residents.

What Are the Common Types of Wildlife Damage in Attics?

The most frequent culprits behind attic destruction are raccoons, squirrels, bats, and mice. Each animal brings its own brand of mayhem. Raccoons, for example, have the strength to tear through roof vents and soffits, while squirrels and mice are notorious for gnawing on wooden beams and electrical wiring. Bats, despite their small size, can introduce hazardous droppings (guano) that harbor dangerous pathogens.

Once these animals get comfortable, insulation becomes their bedding, wires become chew toys, and urine and feces soak into wood and cellulose. That means even after eviction, the attic is far from safe.

Why Is Attic Restoration Necessary After Wildlife Incidents?

A cleaned attic is not just about aesthetics. Contaminated insulation and surfaces can harbor diseases like histoplasmosis and leptospirosis, especially when animal waste is involved. Even a seemingly minor infestation can leave behind allergens and mold spores capable of triggering respiratory issues.

But the impact stretches beyond health. Damaged insulation and chewed wires undermine a home’s energy efficiency and increase fire risks. Gaps torn open by animals let precious heat escape in winter and unwanted humidity creep in during summer. Without a thorough restoration, these invisible hazards can grow, quietly eroding the safety and value of the entire home.

What Are the Key Challenges in Restoring an Attic After Wildlife Damage?

Restoring an attic after animals have made themselves at home is never as simple as a quick cleanup. The first major challenge is identifying the full scope of the damage. Animal activity often extends deeper than it appears, with contaminants seeping into insulation and even into floorboards. Skilled professionals know how to trace droppings, urine trails, and damage hidden behind insulation or within ductwork.

Decontamination itself is a formidable task. Animal waste can contain stubborn bacteria, viruses, and mold, requiring specialized cleaning agents and safety gear. Direct removal is only part of the job; preventing lingering odors and ensuring no contaminants remain is just as critical. Often, insulation must be completely removed and replaced because even a small section left untouched can pose ongoing health risks.

How Do Professionals Approach Attic Decontamination and Cleanup?

Wildlife removal is a careful process that must ensure all animals are gone and entry points are sealed. Once the attic is empty, decontamination begins. Professionals use HEPA vacuums to capture fine dust and pathogens, foggers to treat the air and surfaces, and enzyme cleaners to break down organic waste. For mold, they may apply antimicrobial treatments and physically remove contaminated materials.

Next comes the meticulous replacement of insulation. Technicians may recommend modern materials that offer improved energy efficiency and resistance to pests. This comprehensive approach prevents recurrent infestations and restores the attic to its original condition, or better.

What Should Homeowners Expect During the Attic Restoration Process?

Restoring an attic is not an overnight job. Depending on the level of contamination and structural damage, the process can take anywhere from a single day to several days. Homeowners can expect some disruption, especially if insulation removal is extensive, but reputable services prioritize safety and clear communication.

Precautions include sealing off work spaces from living areas, using negative air pressure to contain dust, and ensuring the entire attic is thoroughly cleaned before new insulation is installed. Choosing a reliable restoration service means looking for teams with experience, transparent pricing, and a clear commitment to health and safety. Many homeowners find local expertise from resources like Insulation Services Ottawa attic insulation especially beneficial when navigating complex restorations.

How to Prevent Future Wildlife Intrusions and Damage?

The best time to ward off future problems is immediately after restoration. Professional teams will often recommend and install exclusion devices, metal mesh over vents, repaired soffits, and sealed entry holes. Routine attic inspections help catch early signs of new invasions before they can escalate.

Insulation also plays a preventive role. High-quality, properly installed materials act as a physical barrier and discourage nesting. Regular maintenance, including keeping branches trimmed away from the roofline and checking for signs of gnawing or droppings, can drastically reduce the chances of another infestation.

What Are the Costs and Benefits of Professional Attic Restoration?

The price of attic restoration after wildlife damage varies based on the size of the space, the scope of contamination, and the type of insulation being installed. Most reputable services offer detailed quotes, factoring in everything from waste removal to new material costs.

Though the initial investment can seem significant, the long-term benefits are clear. Professional restoration brings peace of mind, restores energy efficiency, and eliminates health risks. For many, the real value is knowing their home is safe, clean, and protected, ready to face whatever nature tries next.